… without effecting your SEO ranking too much.
Last year we had a big task at our hands. We decided to rename “XD2Sketch” to “Magicul”. Due to the fact that XD2Sketch wasn’t just an XD2Sketch converter anymore, a new name was necessary. The biggest problem here… “How do we migrate without losing our Google ranking”. Most of our traffic comes from organic search traffic so this was a very very crucial task.
I’ve migrated and switched domains before. From a technical side of things this isn’t very difficult. Depending on if you’re using an Nginx or Apache server a simple file with a bunch of 301 redirects usually does the job and you’re good to go. BUT doing all this while doing everything possible to make it right for Google was a new challenge for me.
So here are my learnings with a quick step-by-step guide on what we’ve done.
Here’s what you’re probably wondering…
- Did your organic traffic drop?
- Did you manage to recover the entire traffic after the domain migration?
- Was your SEO ranking impacted in the long run?
Our traffic dipped massively the first few days after changing the domain. This was expected. Obviously this is an insanely scary thing, since traffic literally means revenue in our case. But after a week or two the traffic was back to normal and so was our revenue. If you do the right things your migration should NOT affect your SEO and your Google ranking.
Here’s a few steps that are good to keep in mind when moving your entire website to a new domain.
Step 1: Setup your new site and make sure the content is identical (as much as possible)
You should setup your new domain, SSL certificates and make sure that everything is working 100% as expected. Really make sure there’s no 404, outdated or invalid SSL certificates or any other funky stuff going on.
Step 2: Configure 301 redirects: If you’re using Nginx or Apache make sure to have a configuration on your old domain in place that has 301 redirects for EVERY page that was previously available under the old domain. A 301 redirect tells Google and other engines engines that your site has permanently moved. Also if a user has bookmarked a page they will simply be redirected.
Here’s an example of an Nginx config that:
server {
    if ($host = xd2sketch.com) {
        return 301 https://magicul.io$request_uri;
    } # managed by Certbot


    listen 80;
    server_name xd2sketch.com;
    return 301 https://magicul.io$request_uri;


}

server {
    listen 443 ssl;
    server_name xd2sketch.com;


    location / {
        return 301 https://magicul.io$request_uri;
    }

    ssl_certificate /etc/letsencrypt/live/xd2sketch.com/fullchain.pem; # managed by Certbot
    ssl_certificate_key /etc/letsencrypt/live/xd2sketch.com/privkey.pem; # managed by Certbot
}
If you don’t want to setup an Nginx server or Apache you can also use a service like Redirect Pizza: https://redirect.pizza/
We did actually use Redirect Pizza in our case and the experience was great.
Here’s how our config in Redirect Pizza looked like:
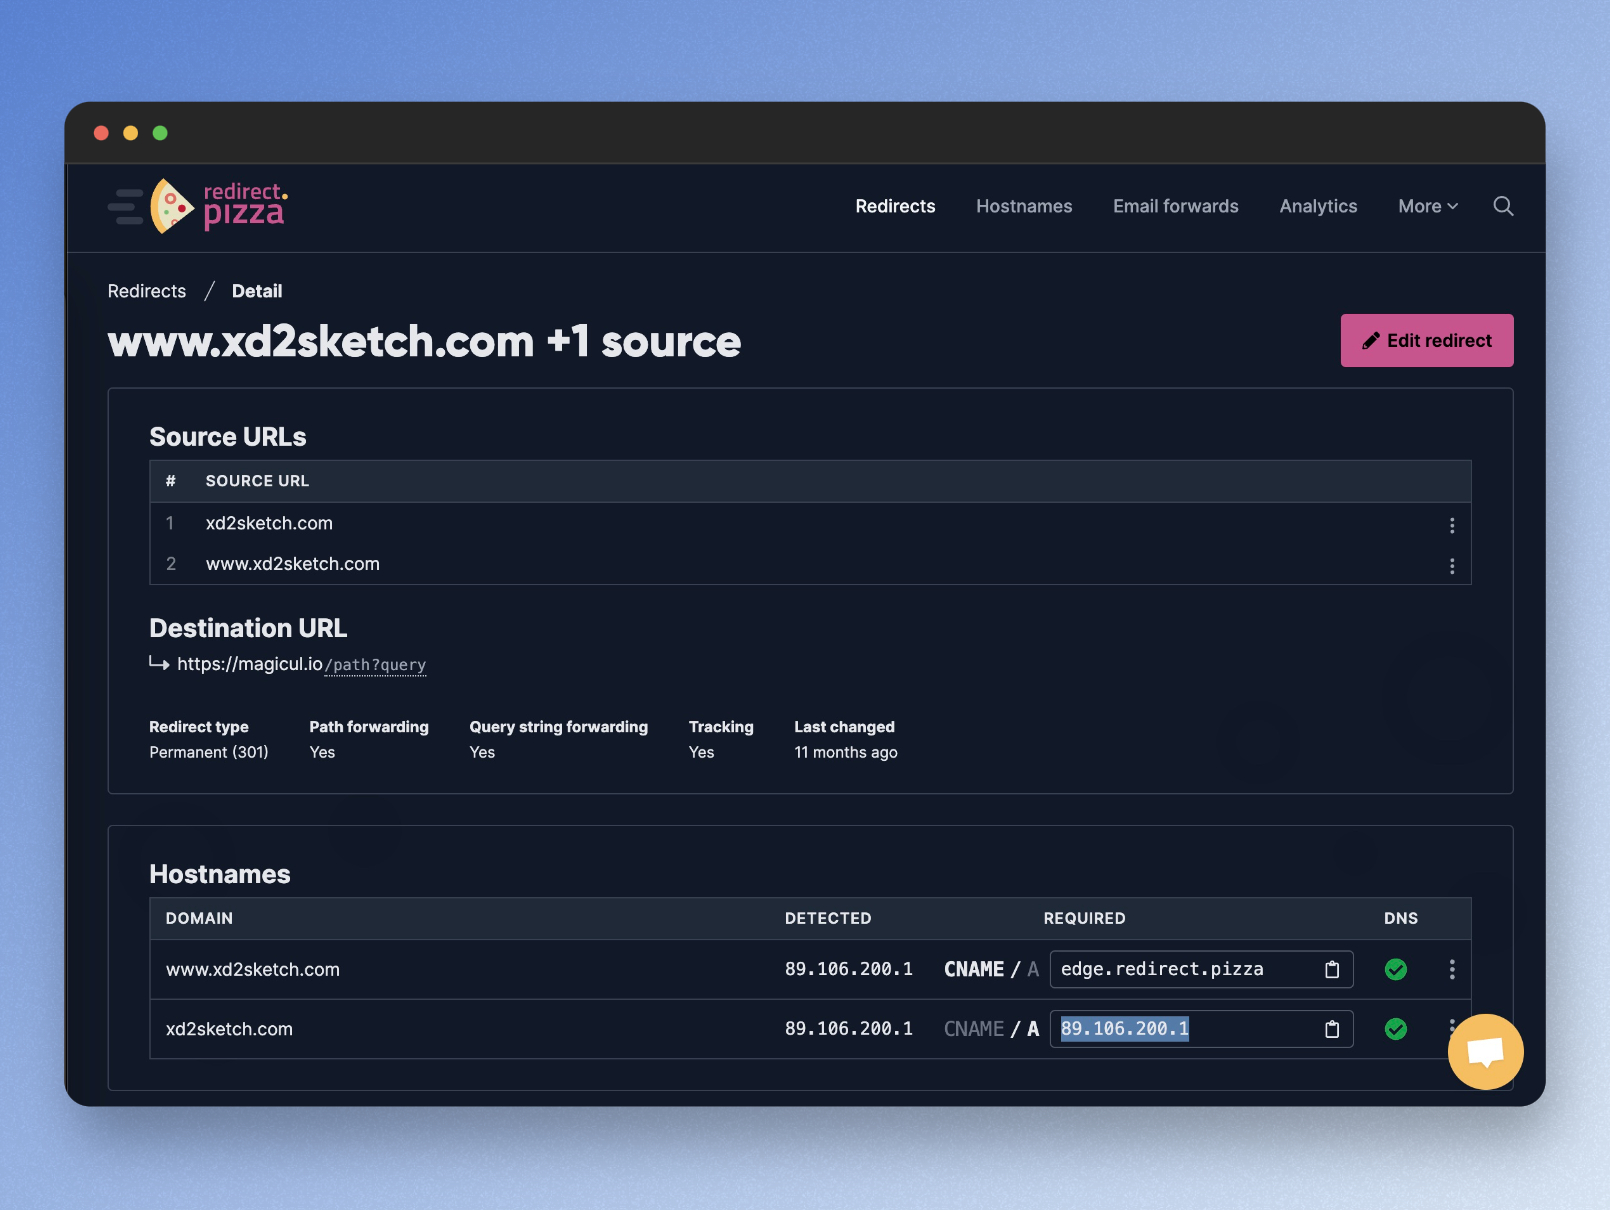
Make sure that you setup redirects for www , http and https as well as for all subdomains that you potentially use.
Step 3: Inform Google about the change of address: You can tell Google about your domain change in the Google Search Console. They provide you with a tool called “Site Migration Tool”. the tool requires you to have both the old and the new domain setup in Google Search console.
You can access the tool here: https://search.google.com/search-console/not-verified?original_url=/search-console/settings/change-address&original_resource_id
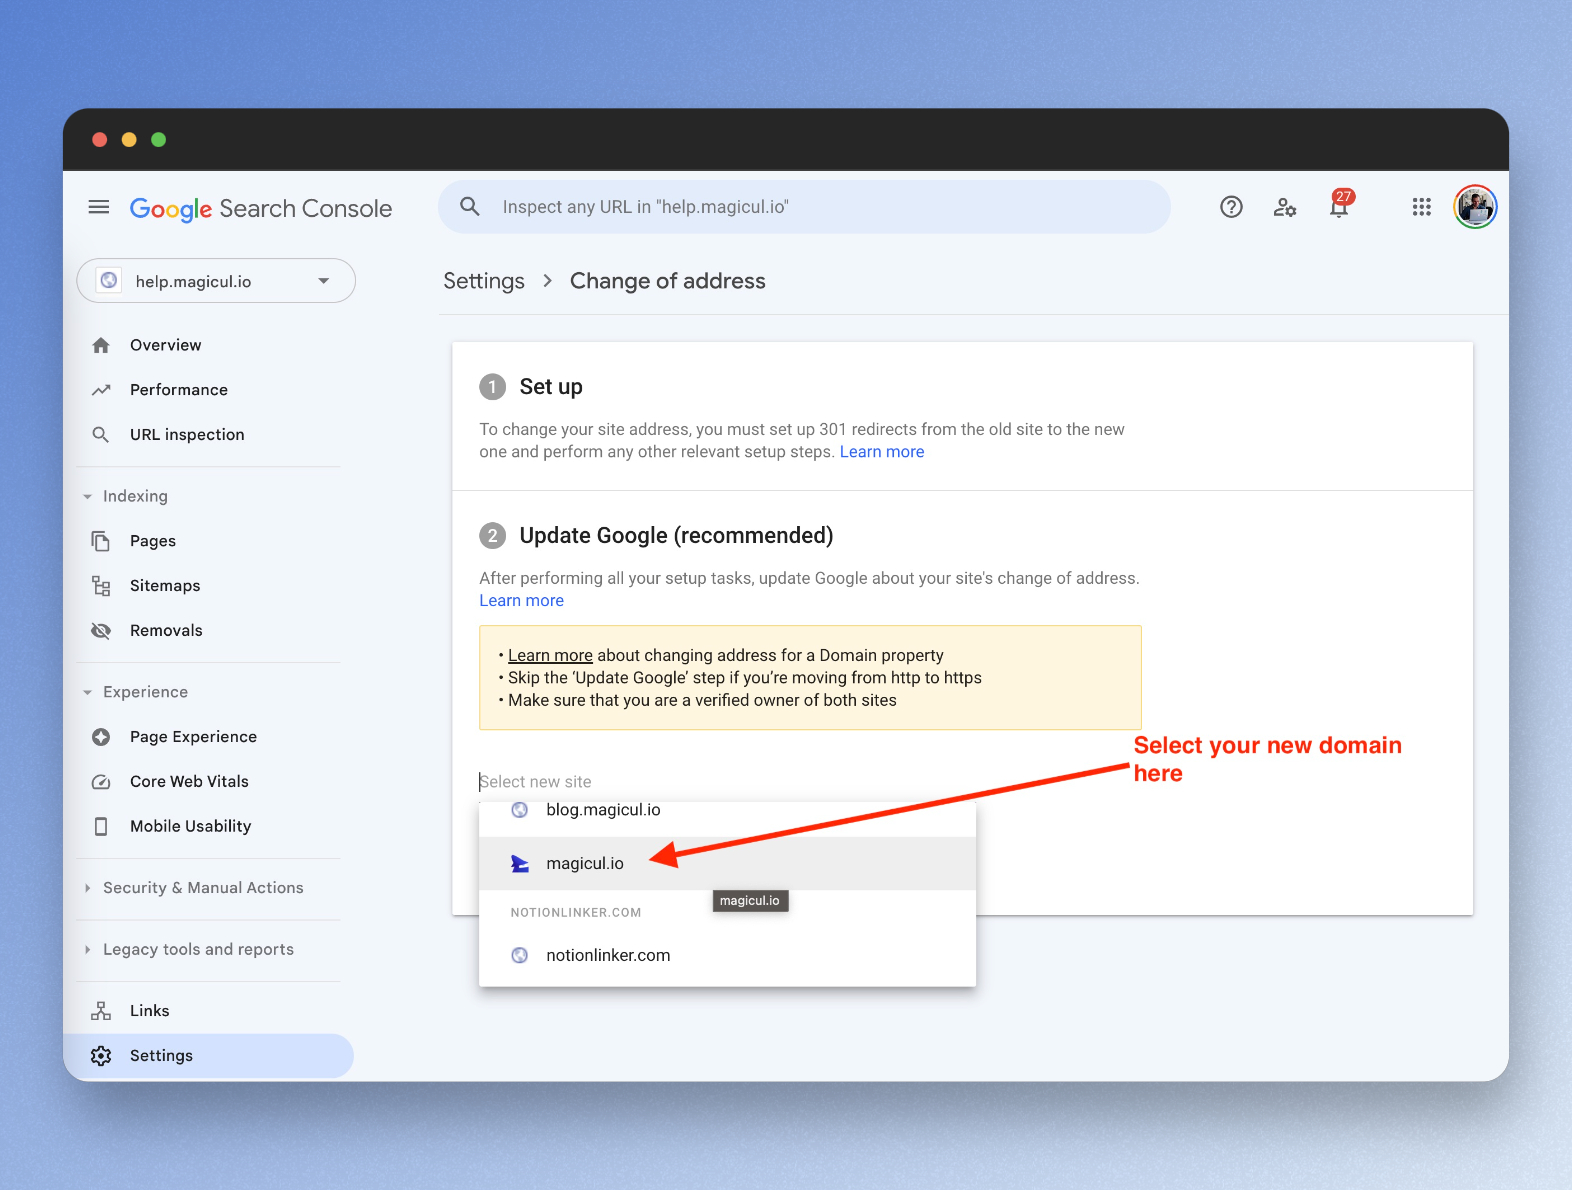
Afterwards Google performs a few basic checks to make sure your ready to start your migration.
Those checks include:
- Checks if 301 redirects are in place
- Checks if the domain is available and reachable
- Check if the new content is index-able
Step 4: Update your sitemap: Generate a new sitemap that includes the URLs for your new domain and submit it to Google via the Search Console. This helps Google discover and index your new URLs faster.
Step 5: Monitor your traffic: Use Google Search Console and Google Analytics to monitor your site’s traffic and search queries. Look for any sudden drops in traffic or search ranking, which could indicate a problem with the move.
Step 6: Update your backlinks: Reach out to the owners of sites that link to your old site and ask them to update their links to point to your new site. The effectiveness of this step can vary, but it’s worth doing, especially for high-quality backlinks.
Step 7: Don’t forget about your social media profiles and local listings: Update your website URL on all social media platforms, Facebook, Instagram, YouTube, Google Maps and so on.