Full code sample is now available on GitHub:
https://github.com/kgoedecke/circleci-beanstalk-example
There are lot of tutorials out there that show how to create a pipeline to deploy apps on AWS Beanstalk using CircleCI but they were either for Version 1 or simply didn’t work because incorrectly set AWS credentials. That’s why I decided to write a tutorial which has all the steps needed to automatically deploy to AWS Elastic Beanstalk.
Beanstalk is an amazing service to deploy and scale web apps and services written in Java, .NET, PHP, Node.js, Python, Ruby, Go, and Docker.
I find it super convenient, with our setup I can simply push my code into a repository and CircleCI deploys to Beanstalk which then takes care of the provisioning of the underlying EC2 instances.
In this tutorial we are going to deploy a small dummy NodeJS application using Github and CircleCI 2.0.
Overview of the tutorial:
1. Setup – We are going to create an AWS IAM user which will be used later with CircleCI to handle Beanstalk
2. Add Credentials to your local AWS EB CLI to spin up the Beanstalk environment
3. Beanstalk Environment – Deployment of the Beanstalk Environment
4. Connecting your Git Repository to CircleCI
5. Connect AWS to CircleCI using IAM Credentials
6. Create the CircleCI Config in the Repository
7. Happy Deploying
Requirement:
- Python and PIP installed
- AWS Account with Admin Access to generate API credentials
- CircleCI account setup and linked to a GitHub or Bitbucket Repository
Step 1: Setup IAM User
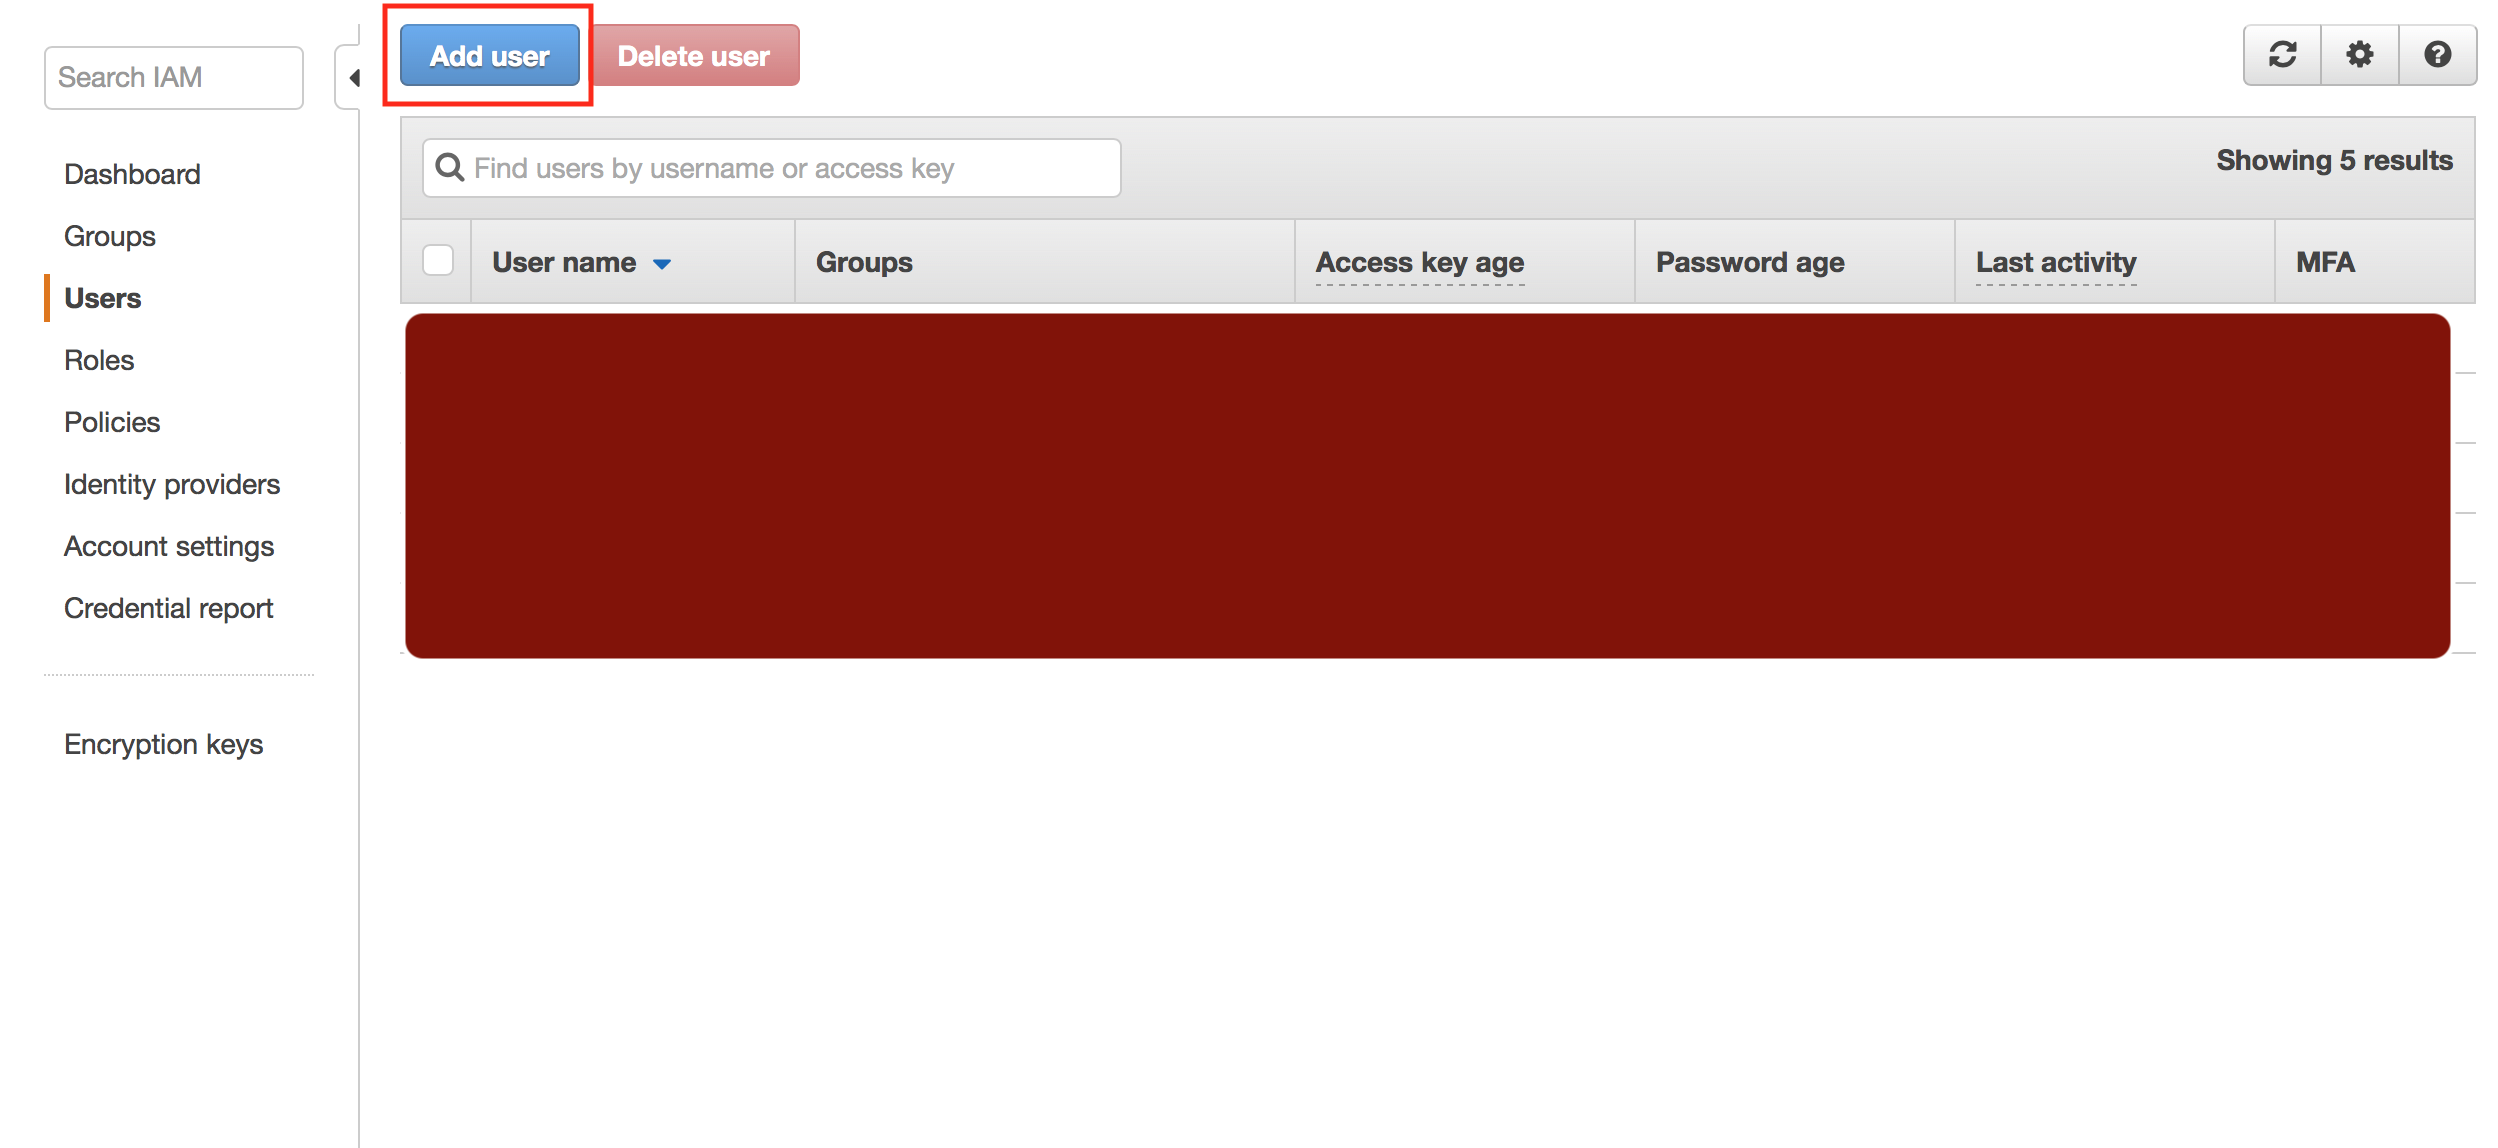
Before starting to use CircleCI to deploy apps to Beanstalk, we need to generate API credentials that will then be used by CircleCI to execute the necessary commands. In order to generate the API credentials, sign into your AWS Management Console and go to “Identity and Access Management – IAM”:
Then, click on “Add user” :
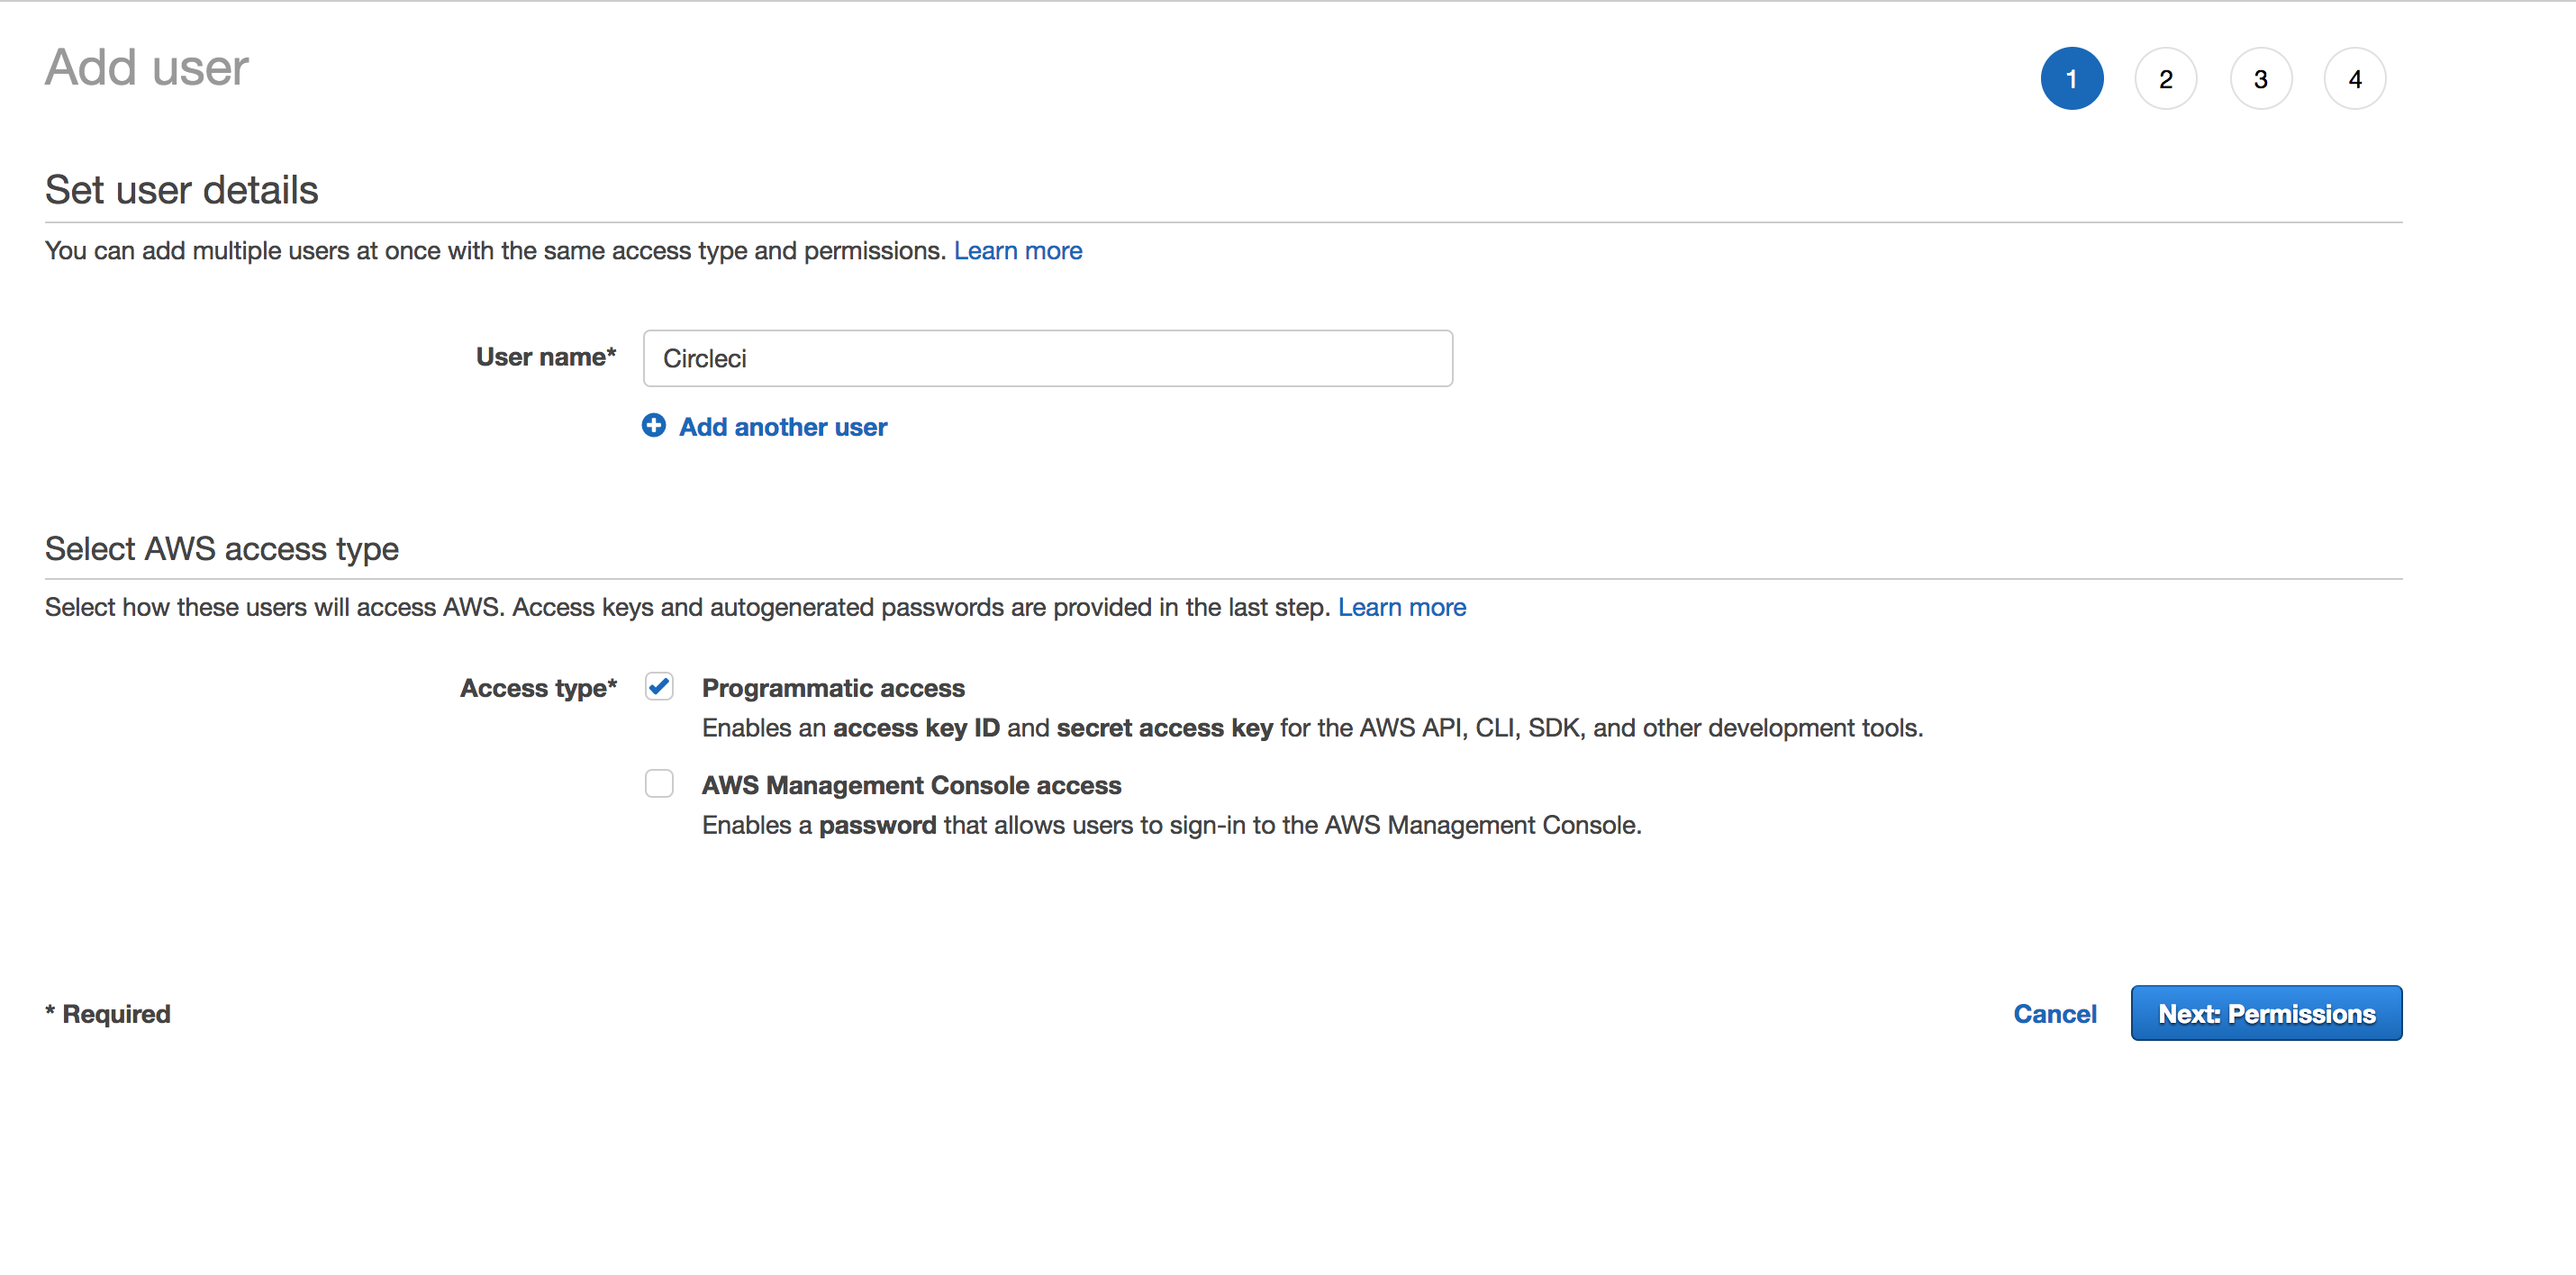
Assign a username for the new account and select “Programmatic access“:
Add “AmazonElasticBeanstalkFullAccess” to user permissions list, this is whats needed for CircleCI to deploy to Beanstalk.
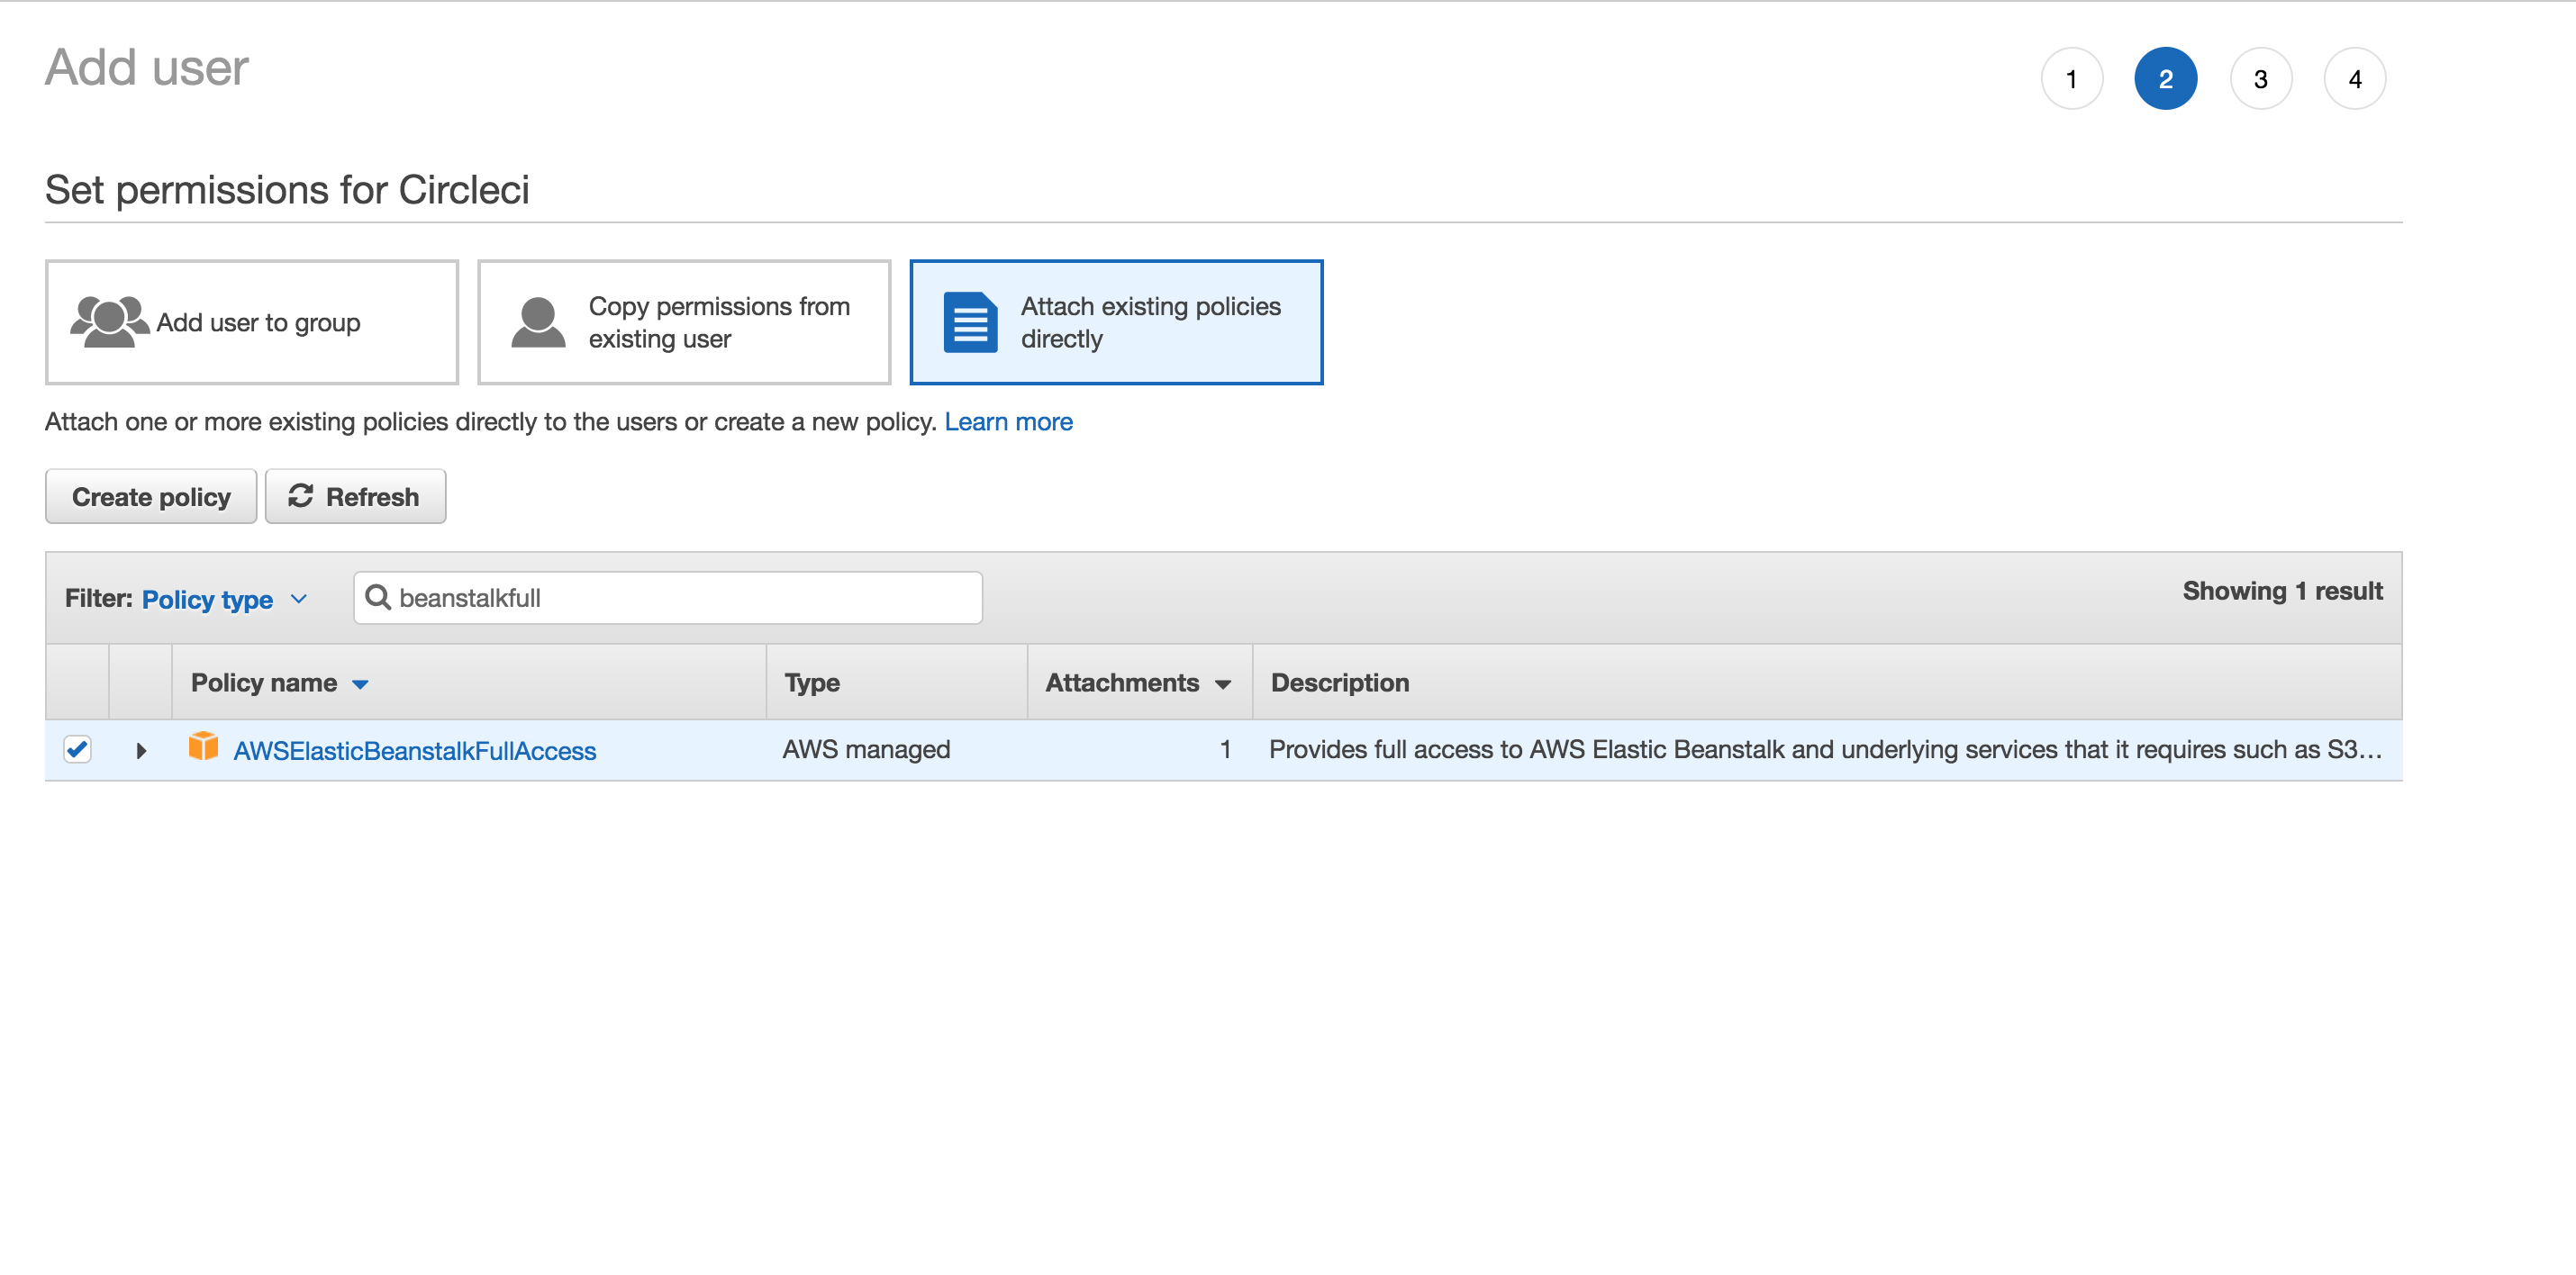
Next, click on “Review” then “Create User”:

You’ll see your Access key ID and your Secret access Key. Both will be used later to trigger the Beanstalk commands from CircleCI.
Step 2: Add AWS Credentials locally
Using the AWS CLI locally we will spin up the Beanstalk environment that will be later used by CircleCI to deploy to. In order to use AWS CLI or EB CLI on your local computer we first need to create a credentials file (~/.aws/credentials ) and store the IAM user credentials in it.
Edit ~/.aws/credentials and add the following content (replace YOUR_ACCESS_KEY_ID and YOUR_SECRET_ACCESS_KEY with the credentials generated in the previous step):
[eb-cli]
aws_access_key_id=YOUR_ACCESS_KEY_ID
aws_secret_access_key=YOUR_SECRET_ACCESS_KEY
Step 3: Install EB CLI
In this section, we are going to install AWS EB CLI.
This step requires Python and pip installed locally. If you have everything ready execute the following command:
pip install --upgrade --user awsebcli
After you’ve installed the EB CLI, add the path to the executable file to your PATH variable.
Step 4: Create your Elastic Beanstalk environment
It’s time to create your Elastic Beanstalk Environment using the EB CLI from your local machine. Just navigate to your app directory (that needs to be deployed to Beanstalk later) and execute eb init to initialize the directory as a Beanstalk application. NOTE: Alternatively you also use the AWS Management dashboard to create your Elastic Beanstalk environment.
Change into the directory of your app:
cd ~/workspace/my-dummy-app
Initialize the app as a Beanstalk application:
eb init --profile eb-cli

Select a default region
1) us-east-1 : US East (N. Virginia)
2) us-west-1 : US West (N. California)
3) us-west-2 : US West (Oregon)
4) eu-west-1 : EU (Ireland)
5) eu-central-1 : EU (Frankfurt)
6) ap-south-1 : Asia Pacific (Mumbai)
7) ap-southeast-1 : Asia Pacific (Singapore)
8) ap-southeast-2 : Asia Pacific (Sydney)
9) ap-northeast-1 : Asia Pacific (Tokyo)
10) ap-northeast-2 : Asia Pacific (Seoul)
11) sa-east-1 : South America (Sao Paulo)
12) cn-north-1 : China (Beijing)
13) cn-northwest-1 : China (Ningxia)
14) us-east-2 : US East (Ohio)
15) ca-central-1 : Canada (Central)
16) eu-west-2 : EU (London)
17) eu-west-3 : EU (Paris)
(default is 3): 5

Select an application to use
1) server-backend
2) [ Create new Application ]
(default is 2): 2

Enter Application Name
(default is "circleci-beanstalk-example"):
Application circleci-beanstalk-example has been created.

It appears you are using Node.js. Is this correct?
(Y/n): Y
Note: Elastic Beanstalk now supports AWS CodeCommit; a fully-managed source control service. To learn more, see Docs: https://aws.amazon.com/codecommit/
Do you wish to continue with CodeCommit? (y/N) (default is n):
Do you want to set up SSH for your instances?
(Y/n): n
This will initialize your application and the environment, you’ll notice that the command has created a .elasticbeanstalk folder in your application. Afterwards we can go ahead and actually spin up the enviroment.
Execute the following command, make sure you use eb-cli as the profile, because thats how we named our credentials in the ~/.aws/credentials file
eb create --profile eb-cli
Enter Environment Name
(default is circleci-beanstalk-example-dev):
Enter DNS CNAME prefix
(default is circleci-beanstalk-example-dev):

Select a load balancer type
1) classic
2) application
3) network
(default is 1): 2
WARNING: You have uncommitted changes.
Creating application version archive "app-6207-180303_000424".
Uploading circleci-beanstalk-example/app-6207-180303_000424.zip to S3. This may take a while.
Upload Complete.
Environment details for: circleci-beanstalk-example-dev
 Application name: circleci-beanstalk-example
 Region: eu-central-1
 Deployed Version: app-6207-180303_000424
 Environment ID: e-x4dhchqab3
 Platform: arn:aws:elasticbeanstalk:eu-central-1::platform/Node.js running on 64bit Amazon Linux/4.4.5
 Tier: WebServer-Standard-1.0
 CNAME: circleci-beanstalk-example-dev.eu-central-1.elasticbeanstalk.com
 Updated: 2018-03-02 23:04:27.933000+00:00
Printing Status:
INFO: createEnvironment is starting.
INFO: Using elasticbeanstalk-eu-central-1-216820535158 as Amazon S3 storage bucket for environment data.
INFO: Created target group named: arn:aws:elasticloadbalancing:eu-central-1:216820535158:targetgroup/awseb-AWSEB-1ESP9MVJF03WM/c0c2e625e11502da
INFO: Created security group named: sg-3017c85d
INFO: Created security group named: awseb-e-x4dhchqab3-stack-AWSEBSecurityGroup-389LSAY1654Q
INFO: Created Auto Scaling launch configuration named: awseb-e-x4dhchqab3-stack-AWSEBAutoScalingLaunchConfiguration-1363I5EH0W93A
 -- Events -- (safe to Ctrl+C)
INFO: Created Auto Scaling group named: awseb-e-x4dhchqab3-stack-AWSEBAutoScalingGroup-618KCZ091L2D
INFO: Waiting for EC2 instances to launch. This may take a few minutes.
INFO: Created Auto Scaling group policy named: arn:aws:autoscaling:eu-central-1:216820535158:scalingPolicy:968245fa-08a9-434c-ae14-2683532a868b:autoScalingGroupName/awseb-e-x4dhchqab3-stack-AWSEBAutoScalingGroup-618KCZ091L2D:policyName/awseb-e-x4dhchqab3-stack-AWSEBAutoScalingScaleDownPolicy-J2G5Z2VU5CU2
INFO: Created Auto Scaling group policy named: arn:aws:autoscaling:eu-central-1:216820535158:scalingPolicy:74b34e27-91b2-4654-ae4a-1adac1f12bd1:autoScalingGroupName/awseb-e-x4dhchqab3-stack-AWSEBAutoScalingGroup-618KCZ091L2D:policyName/awseb-e-x4dhchqab3-stack-AWSEBAutoScalingScaleUpPolicy-1084AE1QSLJED
INFO: Created CloudWatch alarm named: awseb-e-x4dhchqab3-stack-AWSEBCloudwatchAlarmLow-1N62LDQ99LOQU
INFO: Created CloudWatch alarm named: awseb-e-x4dhchqab3-stack-AWSEBCloudwatchAlarmHigh-1RKTU1TGKSTPM
INFO: Created load balancer named: arn:aws:elasticloadbalancing:eu-central-1:216820535158:loadbalancer/app/awseb-AWSEB-1SMYH0Q88CKQP/31bb253db6f8c427
INFO: Created Load Balancer listener named: arn:aws:elasticloadbalancing:eu-central-1:216820535158:listener/app/awseb-AWSEB-1SMYH0Q88CKQP/31bb253db6f8c427/26fbd477342dee44
INFO: Successfully launched environment: circleci-beanstalk-example-devssss
Step 4: Connect Repo with CircleCI
Now that our application environment is up and running (please verify that it actually is using the AWS Management Dashboard), we can go ahead and connect CircleCI to Beanstalk.
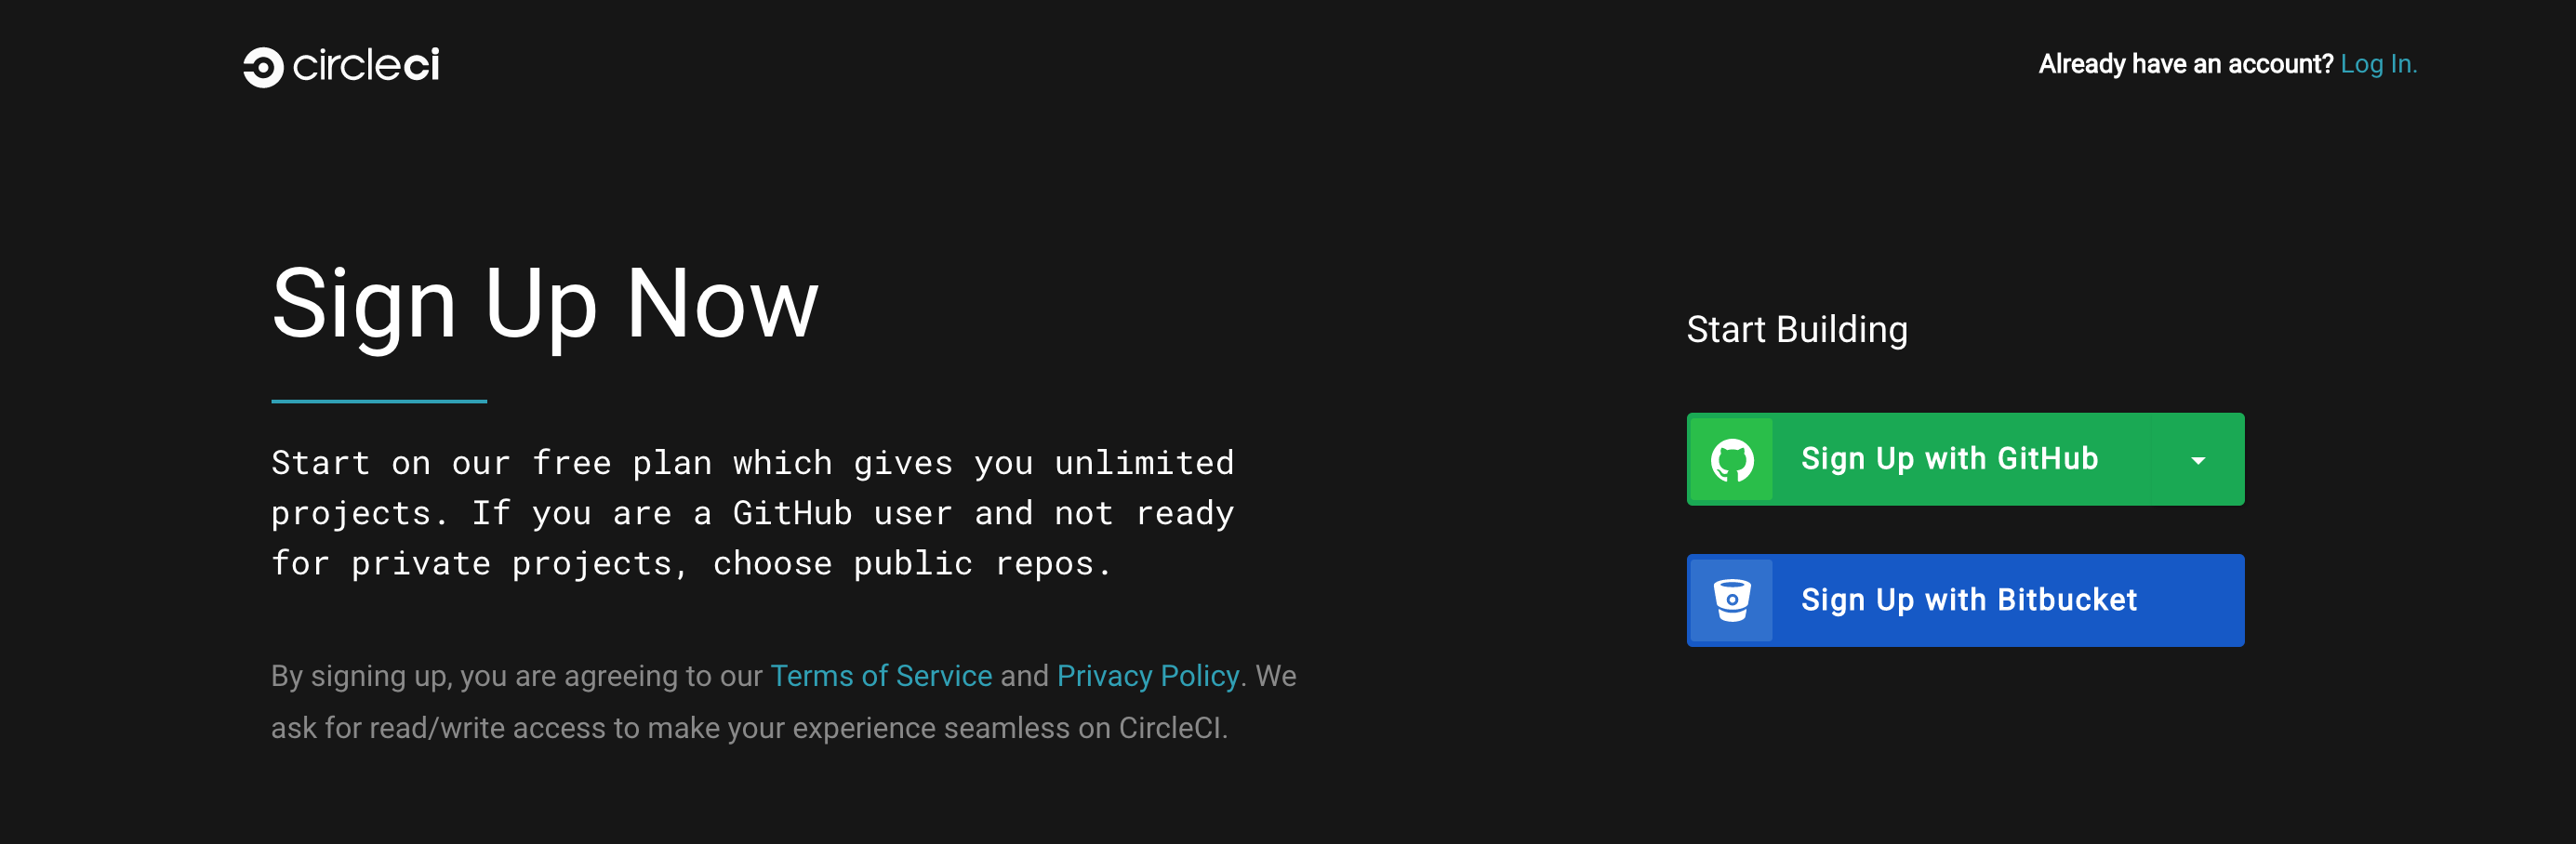
CircleCI needs a repository to pull the code from. Currently CircleCI supports GitHub and BitBucket. Go to https://circleci.com/signup/
and Click on Signup with Github or Bitbucket. You should login into Github and Bitbucket before this.
Step 5: Add IAM user Credentials in CircleCI
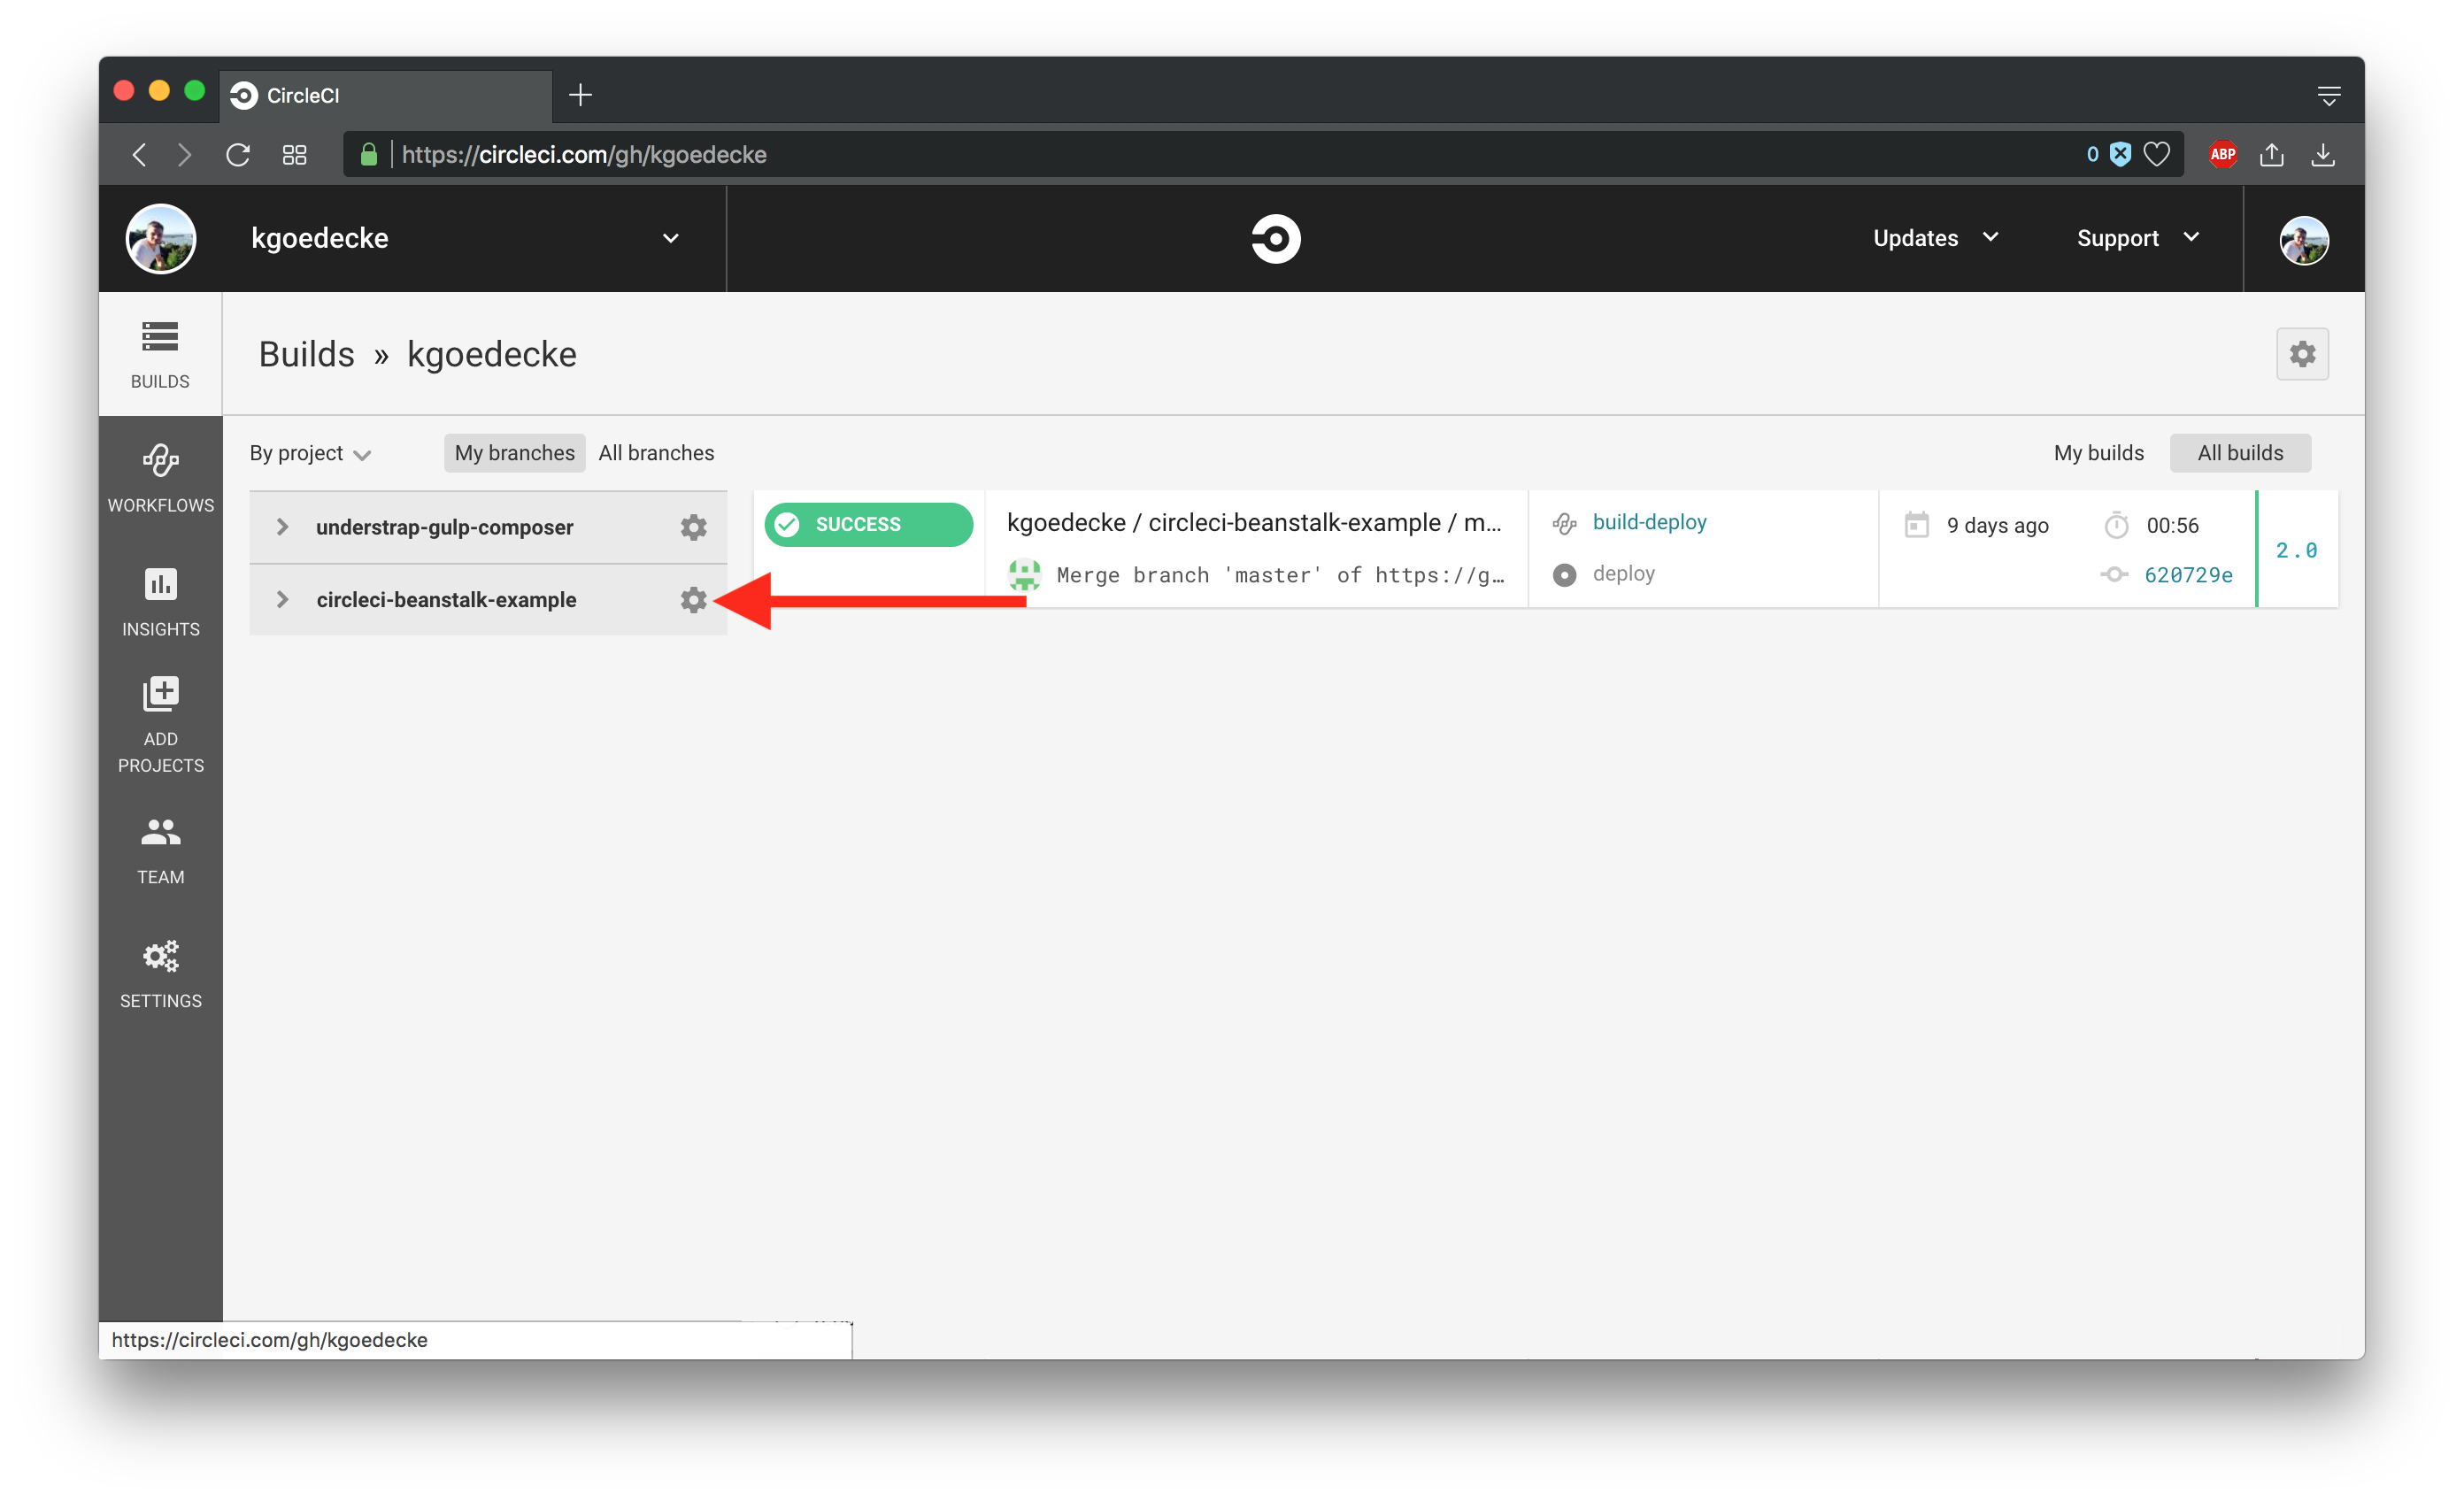
After you’ve linked your repository to your CircleCI account, head over to the CircleCI Dashboard and navigate into your project. Click on the settings icon of the repository that you want to setup.
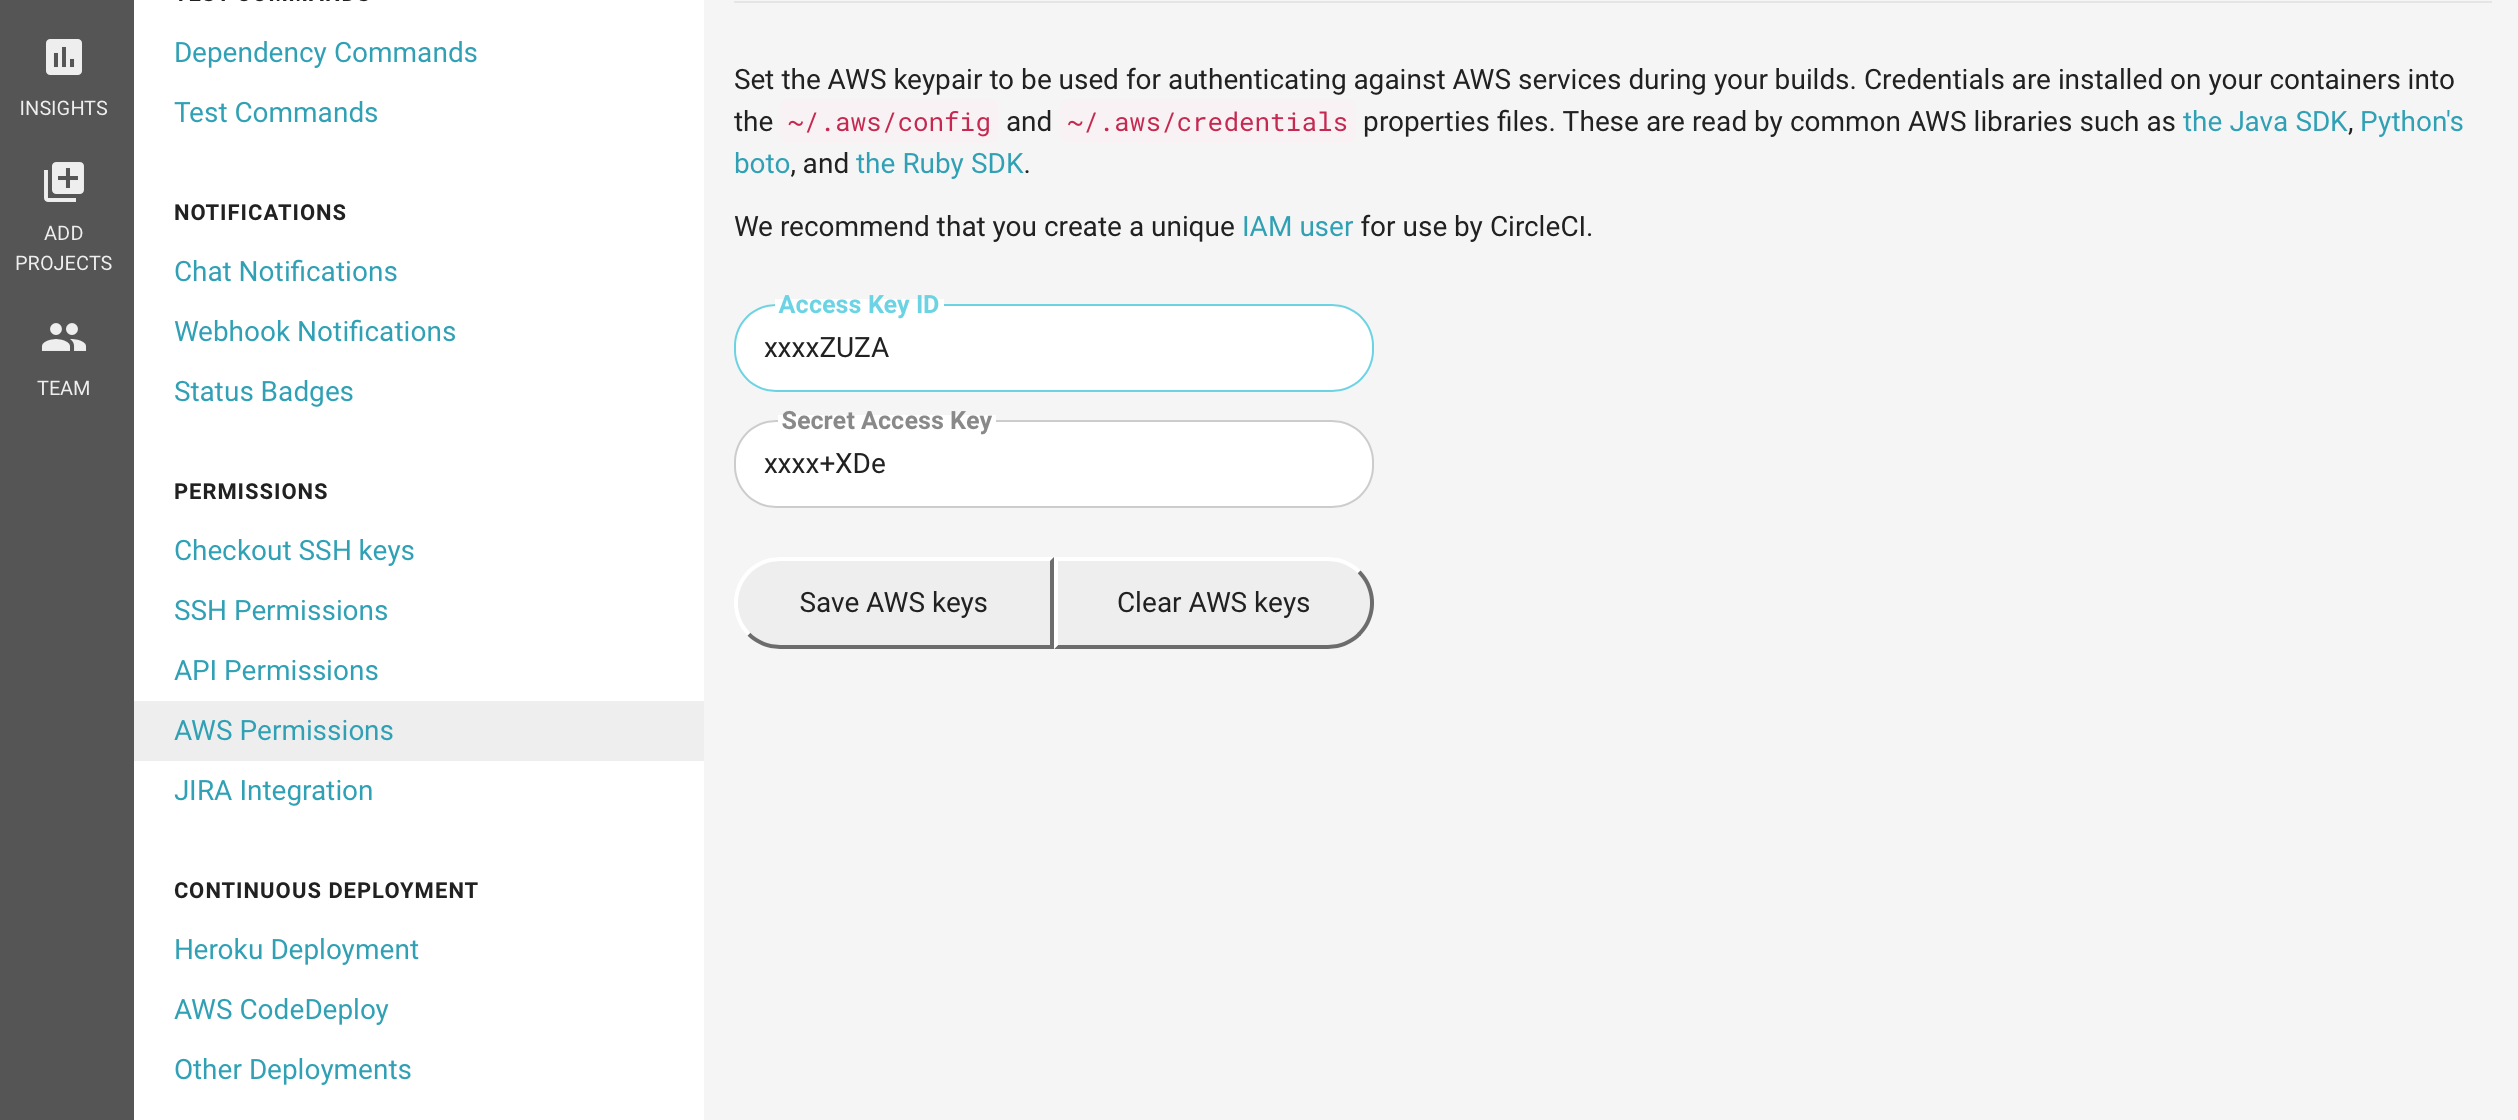
In the Settings section scroll down and click on “AWS Permissions” as shown in the screenshot below. Insert your access and secret key of the “circleci” programmatic user that we created previously using the AWS Dashboard.
Step 6: Create CircleCI config
We are going to use CircleCI version 2.0 because CircleCI is officially discontinuing support for CircleCI 1.0 builds after August 31st, 2018.
Create .circleci/config.yml inside the root directory of your application and add it to your repository. CircleCI automatically sets two environment variables ($AWS_ACCESS_KEY_ID and $AWS_SECRET_ACCESS_KEY ). We will use those variables to configure the AWS EB CLI.
version: 2
jobs:
  deploy:
    docker:
      - image: circleci/python:2.7
    working_directory: ~/repo
    steps:
      - checkout
      - run:
          name: Install awscli
          command: |
            sudo pip install awsebcli --upgrade
      - run:
          name: Create AWS credentials manually
          command: |
            mkdir ~/.aws
            touch ~/.aws/config
            chmod 600 ~/.aws/config
            echo "[profile eb-cli]" > ~/.aws/config
            echo "aws_access_key_id=$AWS_ACCESS_KEY_ID" >> ~/.aws/config
            echo "aws_secret_access_key=$AWS_SECRET_ACCESS_KEY" >> ~/.aws/config
      - run:
          name: Deploy to EB if branch is Master
          command: |
            eb use circleci-beanstalk-example --profile eb-cli
            eb deploy -v --staged --profile eb-cli

workflows:
  version: 2
  build-deploy:
    jobs:
      - deploy:
          filters:
            branches:
              only:
                - master
                - develop
Let’s discuss the importance of the CircleCI config and also look into the run steps that we’ve configured.
     - run:
          name: Create AWS credentials manually
          command: |
            mkdir ~/.aws
            touch ~/.aws/config
            chmod 600 ~/.aws/config
            echo "[profile eb-cli]" > ~/.aws/config
            echo "aws_access_key_id=$AWS_ACCESS_KEY_ID" >> ~/.aws/config
            echo "aws_secret_access_key=$AWS_SECRET_ACCESS_KEY" >> ~/.aws/config
In this step we are manually populate the AWS credentials from the environment variables that CircleCI sets. This is necessary because the AWS EB CLI is not able to use the environment variables directly. Instead it needs them to be set in the config file (~/.aws/config ).
      - run:
          name: Deploy to EB if branch is Master
          command: |
            eb use circleci-beanstalk-example --profile eb-cli
            eb deploy -v --staged --profile eb-cli
The above step tells CircleCI to use the environment named circleci-beanstalk-example with the credentials profile named eb-cli, which we’ve defined in the config file. You might replace the name of the environment with the one of your application.
After we’ve successfully created the CircleCI config file, commit the file and push it to your repository.
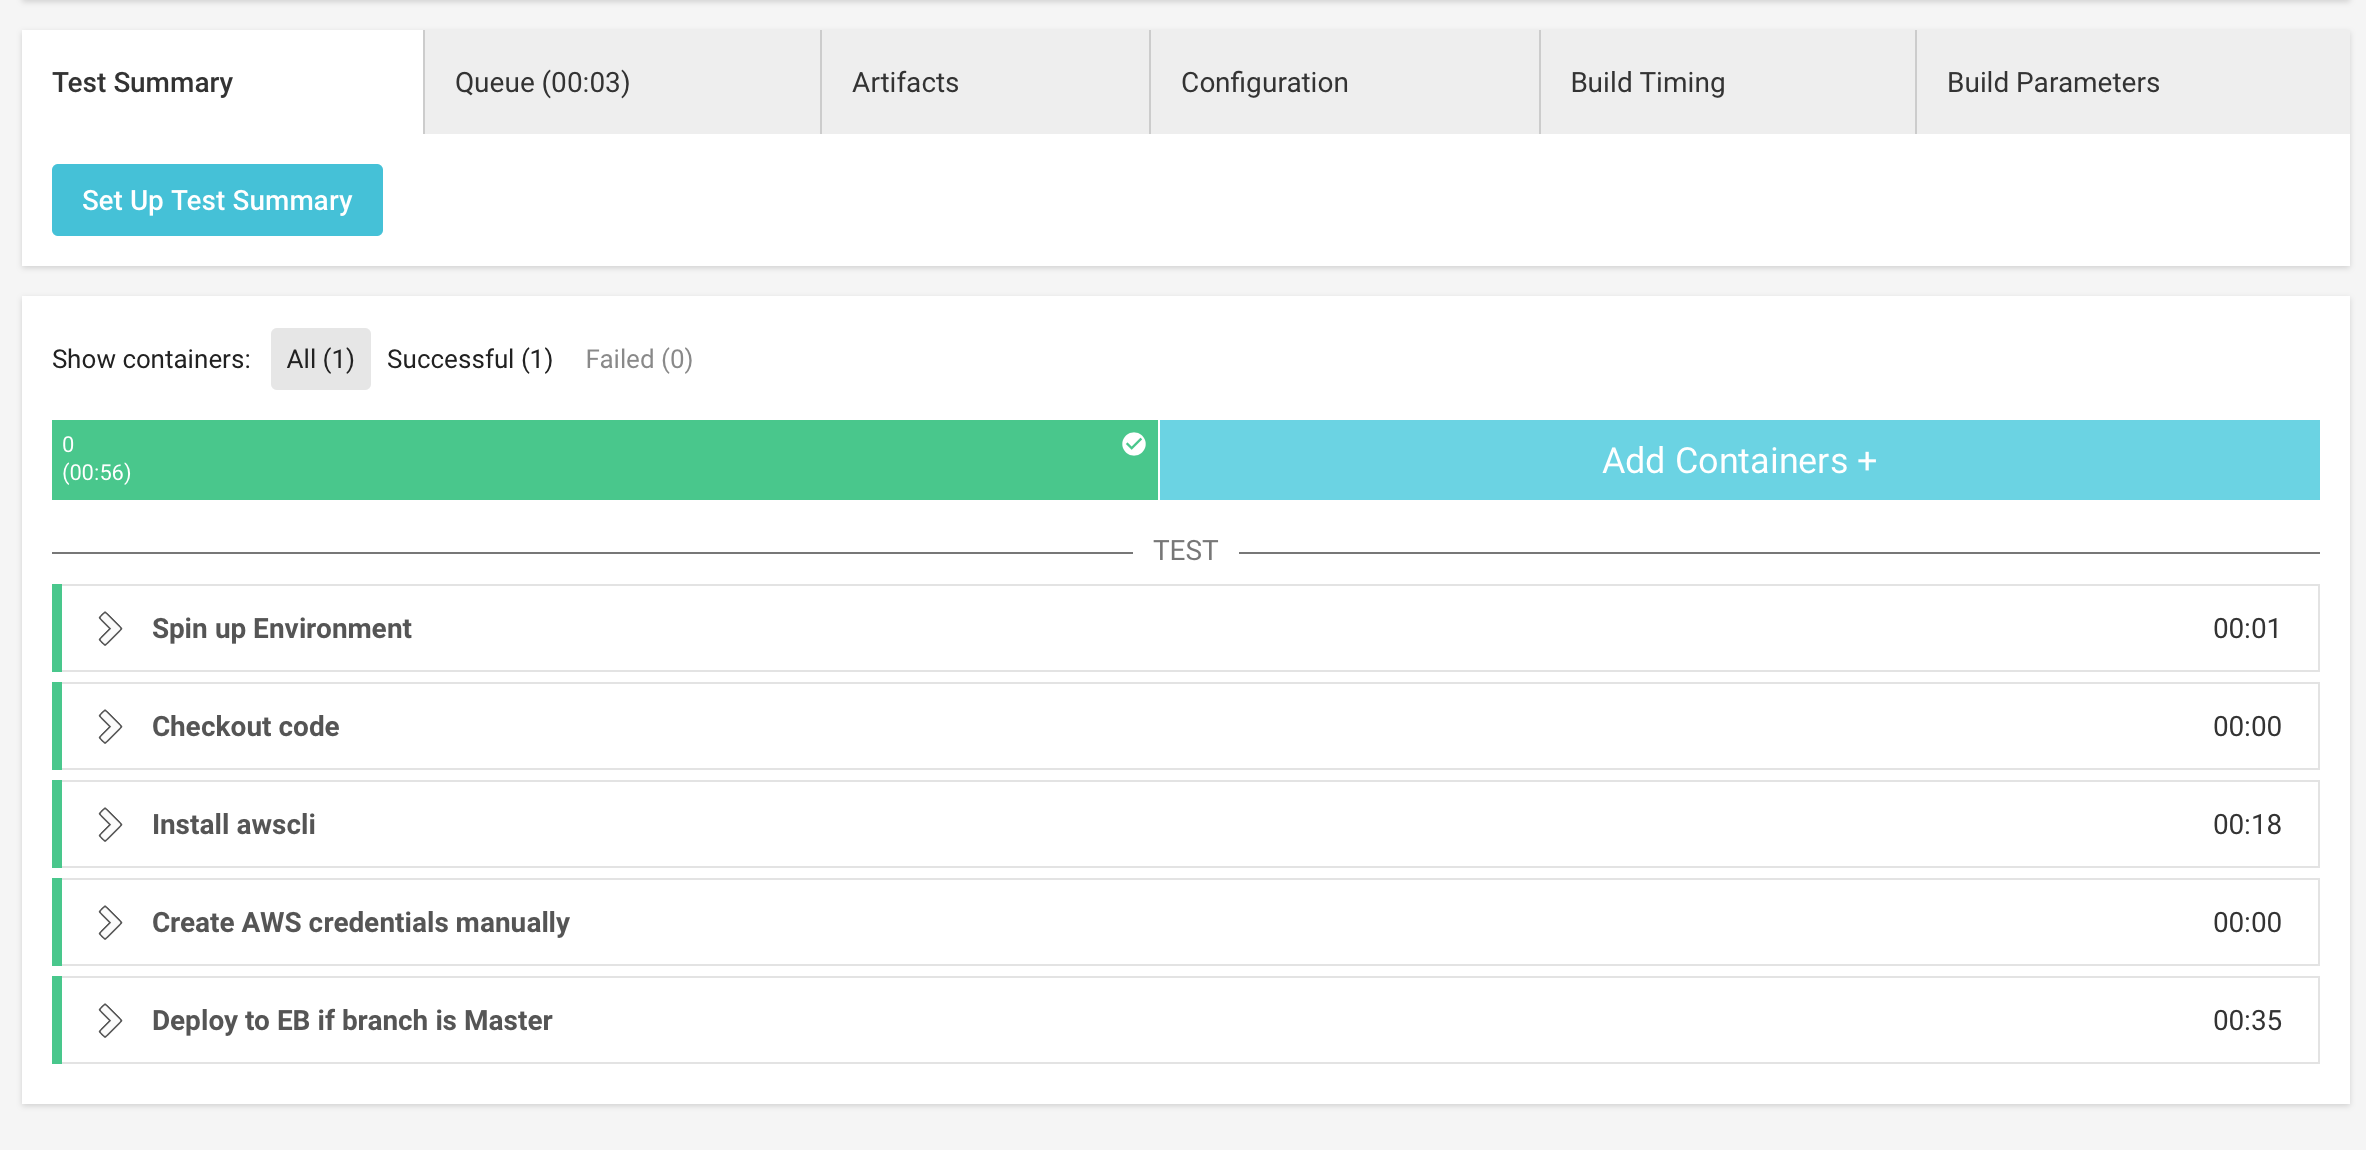
Go back to the CircleCI Dashboard and you should see your code building and deploying automatically to AWS ElasticBeanstalk.
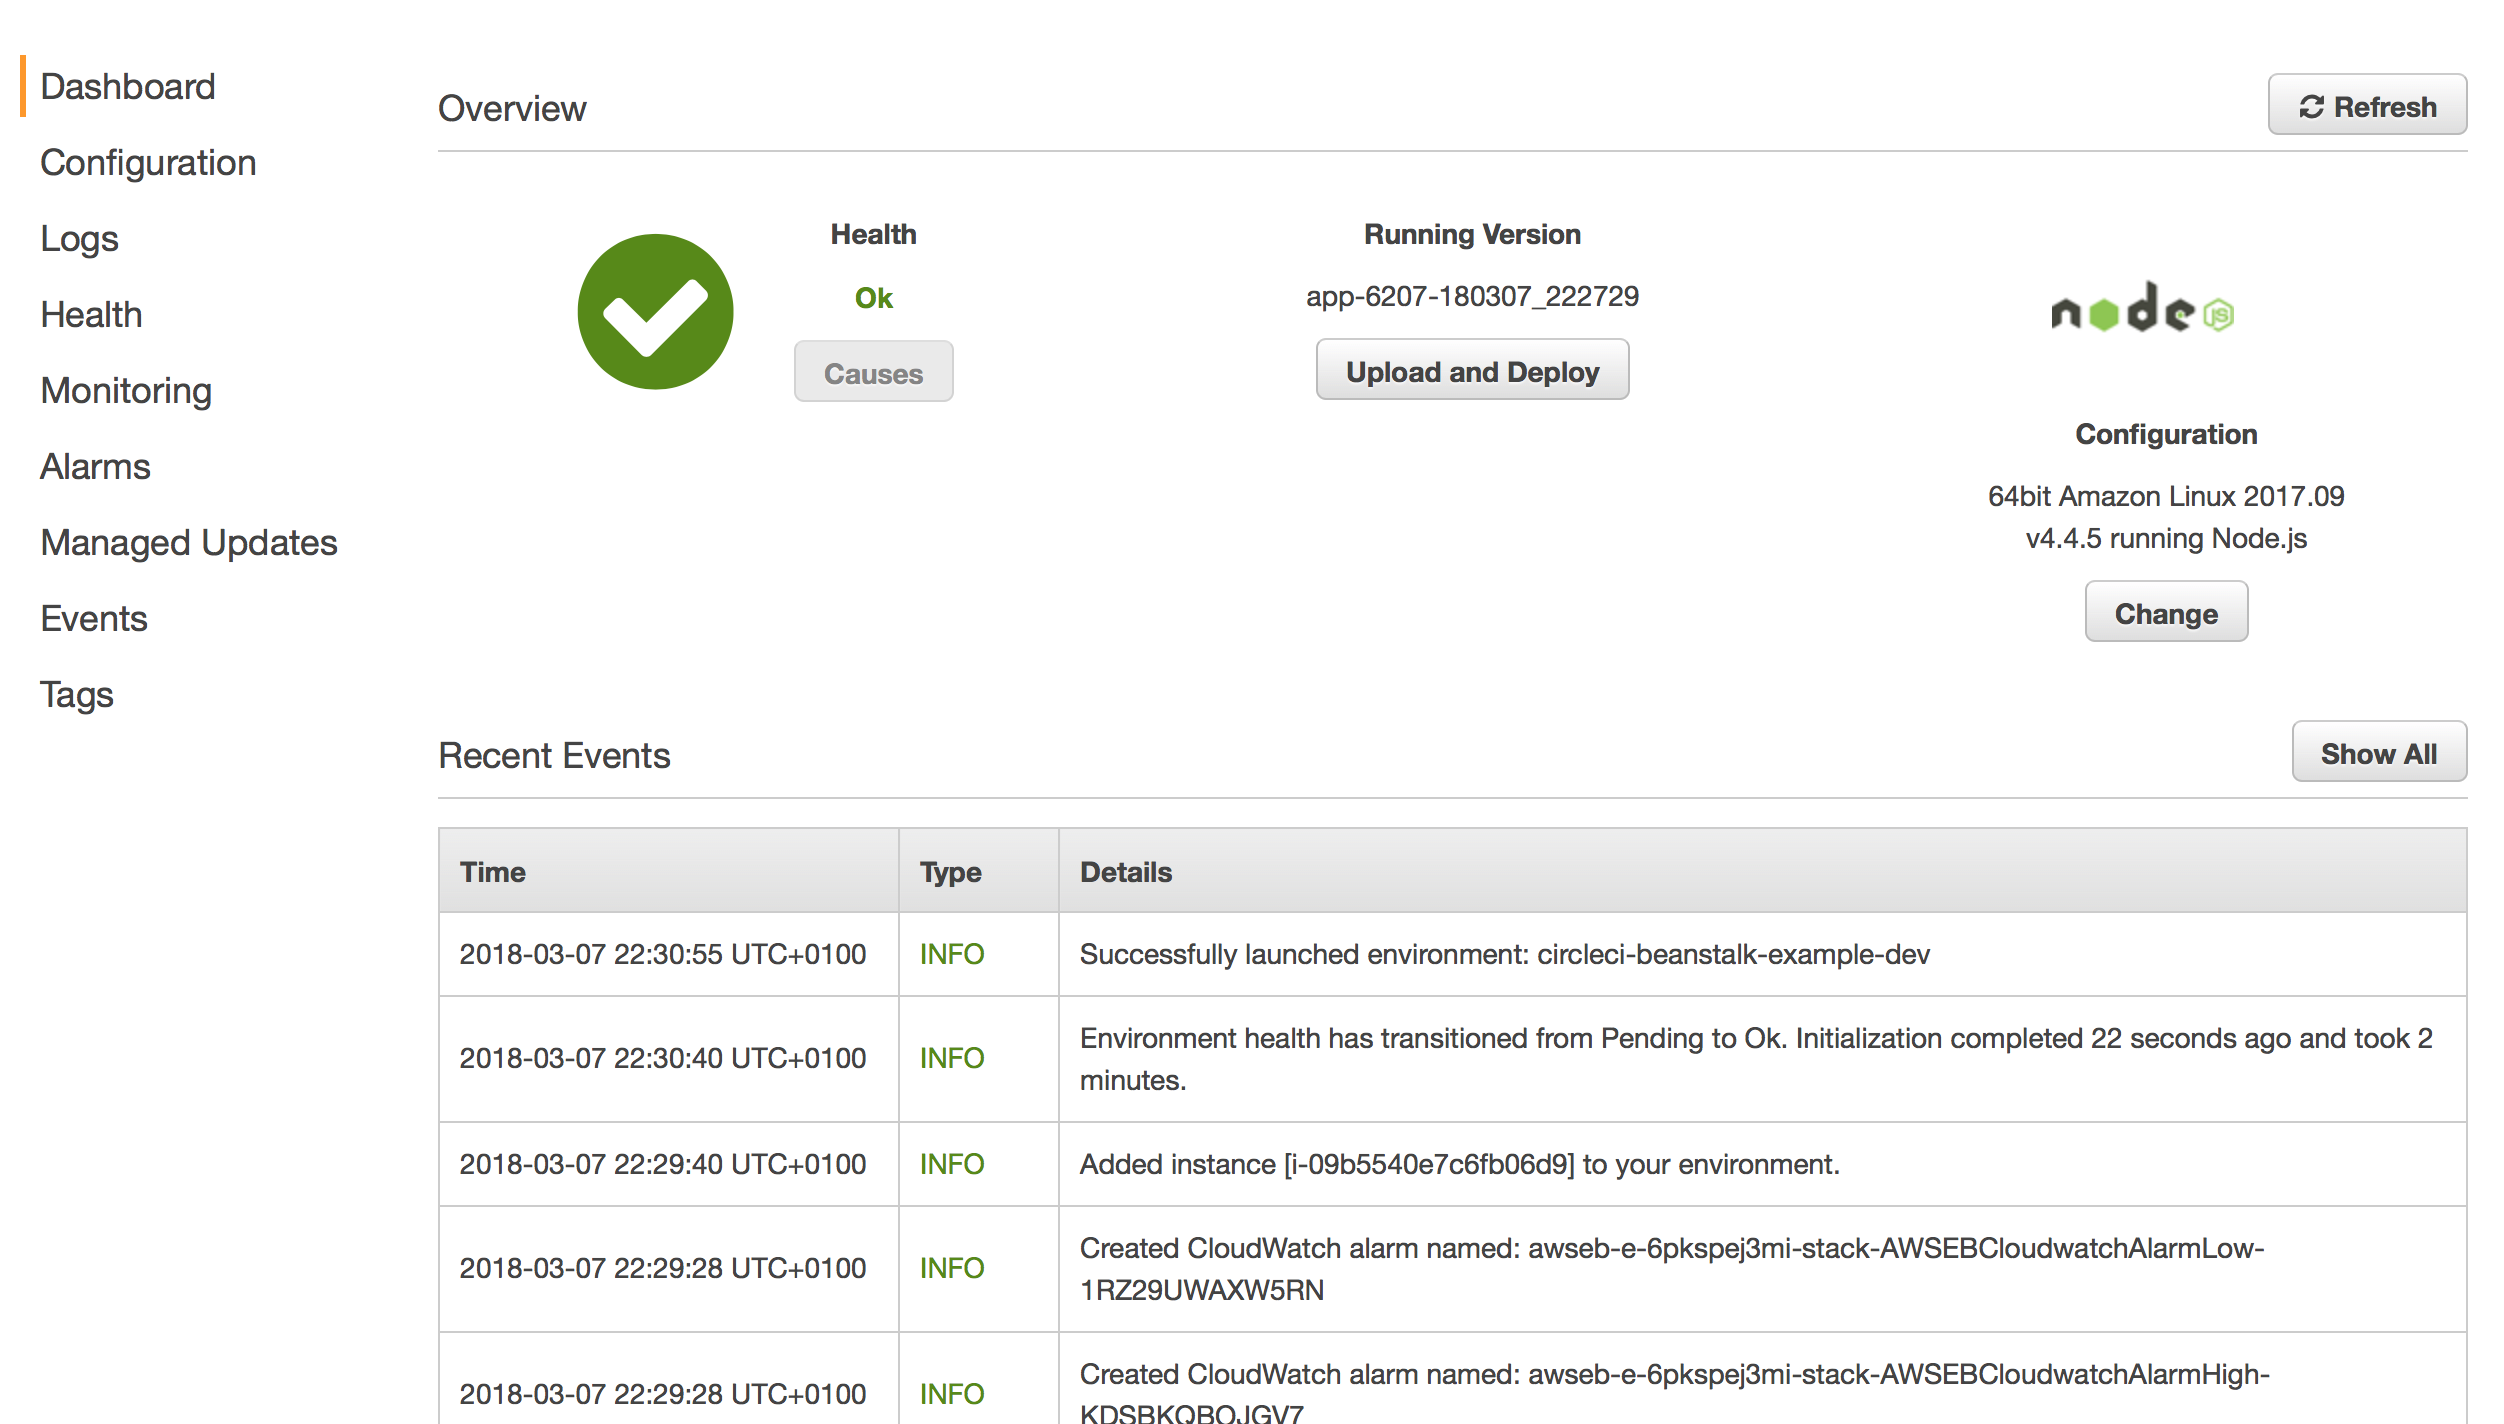
Within the AWS Dashboard you should see the deployment process. After a little while the Health status should switch to “Ok”.
Every time code is pushed to the master branch now CircleCI will deploy automatically to Beanstalk.
If you run into any issues please feel free to comment below.
In the next tutorial I’ll show you how to deploy to different environments for a staging and production environment using different branches (develop / master).
This was very helpful.
Perhaps a final step on how to `curl` the API?
Thanks again for putting this together.
Great post!
Crisp and just the required details to get started.
Thanks
Hi Kevin… Thanks for this, this will get me started…
Any news on the staging / product update to this tutorial?
Cheers..
Ohh Tks man!! You save my life! haha! I was seeking exactly this!! I finded others examples that was created a zip file of application and zip file was send to ELB
#!/bin/bash -eo pipefail
eb use circleci-beanstalk-example –profile eb-cli
eb deploy -v –staged –profile eb-cli
ERROR: The EB CLI cannot find a default region. Run “eb init” or use a specific region by including the “–region” option with the command.
Exited with code 3
can anyone please suggest solution for above error .
i have solved above problem but still getting different issue .
#!/bin/bash -eo pipefail
eb use circleci-beanstalk-example-dev –region us-west-2 –profile eb-cli
eb deploy -v –staged –profile eb-cli
ERROR: This directory has not been set up with the EB CLI
You must first run “eb init”.
Exited with code 126
> re: You must first run “eb init”. error
Took me a while but figured out a work around, hope this helps somebody.
If you follow just the example in the post you will get the above error (you must run eb init) if the file .elasticbeanstalk/config.yml doesn’t exist (not committed to your repo). If you do not want to commit this file to your repo (so that each dev can have their own eb configuration), here is the workaround.
1. Create a file call ebconfig.yml somewhere in your repo and commit that instead. I put it it .circleci/ebconfig.yml
2. Copy the content if the .elasticbeanstalk/config.yml file (generated after you ran eb init locally) into ebconfig.yml. For example, mine looks like this:
“`
branch-defaults:
develop:
environment: my-example-app-dev
master:
environment: my-example-app-prod
global:
application_name: my-example-app
default_ec2_keyname: app_ebkey
default_platform: 64bit Amazon Linux 2017.09 v2.6.6 running PHP 7.0
default_region: us-west-2
profile: aws-user
sc: git
“`
3. Modify .circleci/config.yml to cp that file to .elasticbeanstalk/config.yml during deployment by adding these lines in the run command:
“`
mkdir ~/repo/.elasticbeanstalk
cp ~/repo/.circleci/ebconfig.yml ~/repo/.elasticbeanstalk/config.yml
“`
For example, my .circleci/config.yml now look like this:
“`
version: 2
jobs:
deploy:
docker:
– image: circleci/python:2.7
working_directory: ~/repo
steps:
– checkout
– run:
name: Install awscli
command: |
sudo pip install awsebcli –upgrade
– run:
name: Create AWS credentials manually
command: |
mkdir ~/.aws
touch ~/.aws/config
chmod 600 ~/.aws/config
echo “[profile eb-cli]” > ~/.aws/config
echo “aws_access_key_id=$AWS_ACCESS_KEY_ID” >> ~/.aws/config
echo “aws_secret_access_key=$AWS_SECRET_ACCESS_KEY” >> ~/.aws/config
mkdir ~/repo/.elasticbeanstalk
cp ~/repo/.circleci/ebconfig.yml ~/repo/.elasticbeanstalk/config.yml
– run:
name: Deploy to EB if branch is develop
command: |
eb use my-example-app-dev –profile eb-cli
eb deploy -v –staged –profile eb-cli
workflows:
version: 2
build-deploy:
jobs:
– deploy:
filters:
branches:
only:
– develop
“`
Good luck!
Thanks for sharing your idea, it worked just fine for me !